Service instructions for JS-20LARGO 1 Installation This detector is designed for indoor use. The detector can be mounted on a flat wall or in a corner. Do not place the detector near an air conditioning or heating unit or any other object that causes a temperature change. The detector must...
JS-20LARGO
Too much choice? Chat or call us at 085-0160316
There are no products in these categories. Shop on.
Service instructions for JS-20LARGO
1 Installation
This detector is designed for indoor use. The detector can be mounted on a flat wall or in a corner. Do not place the detector near an air conditioning or heating unit or any other object that causes a temperature change. The detector must have a full and open view of the area to be protected.
1. Open the detector housing (press the plastic button at the bottom of the housing using a screwdriver).
2. Remove the circuit board by pressing the little button on the inside of the housing
3. Push through the pre-formed holes for the cables and screws.
4. Fix the enclosure to the wall (2.5 metres above the ground).
5. Place the circuit board back into the rear housing and connect the cables to the inputs and outputs
6. Replace the housing.
Note: Avoid damaging the PIR sensor!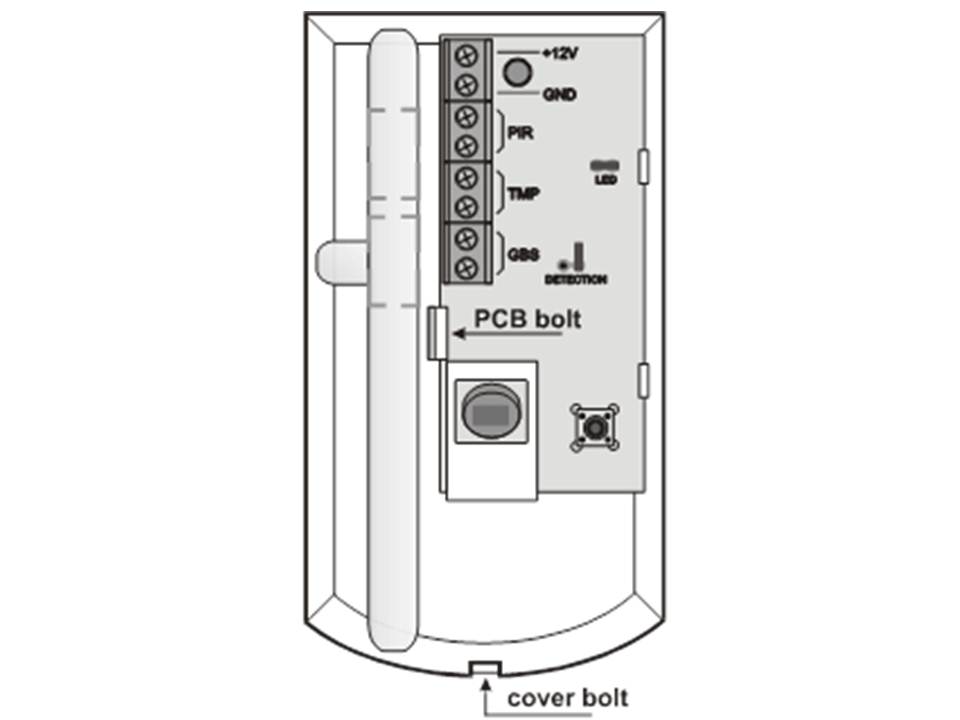
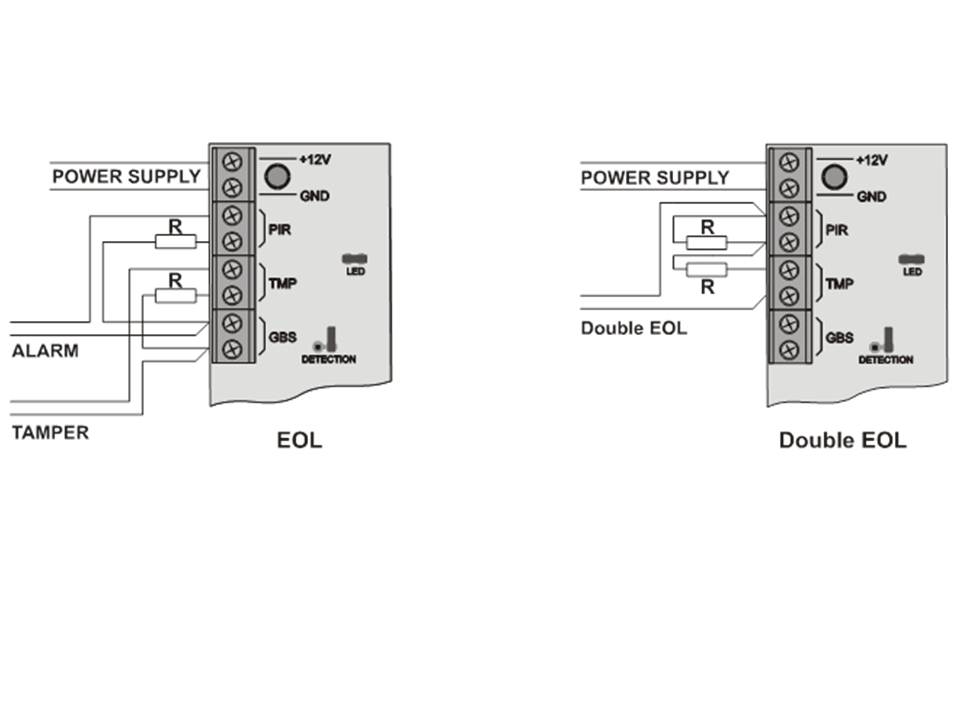
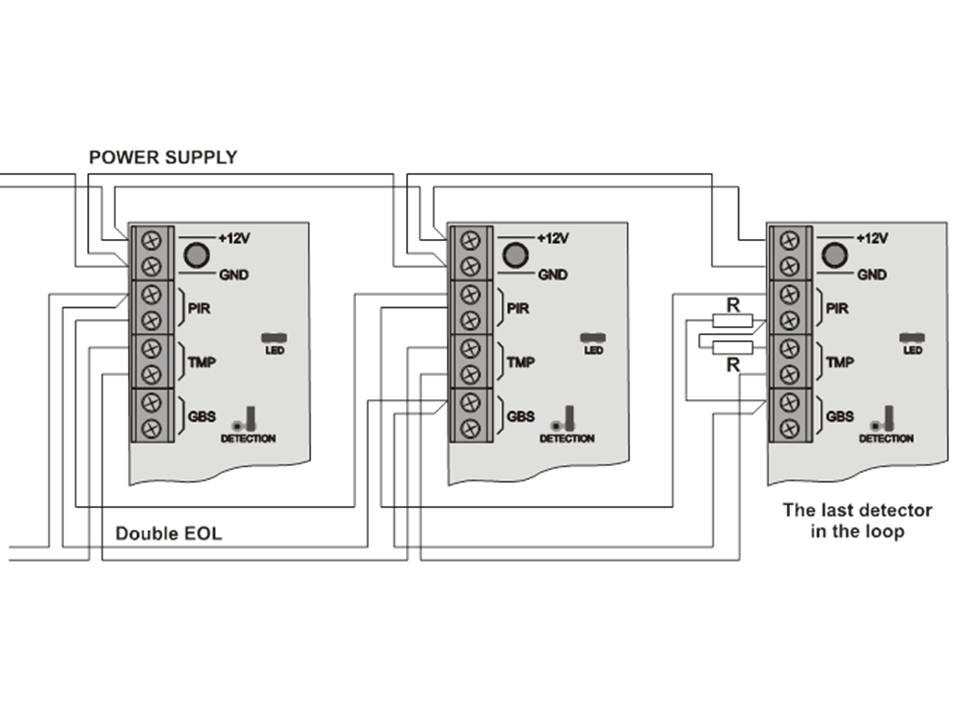
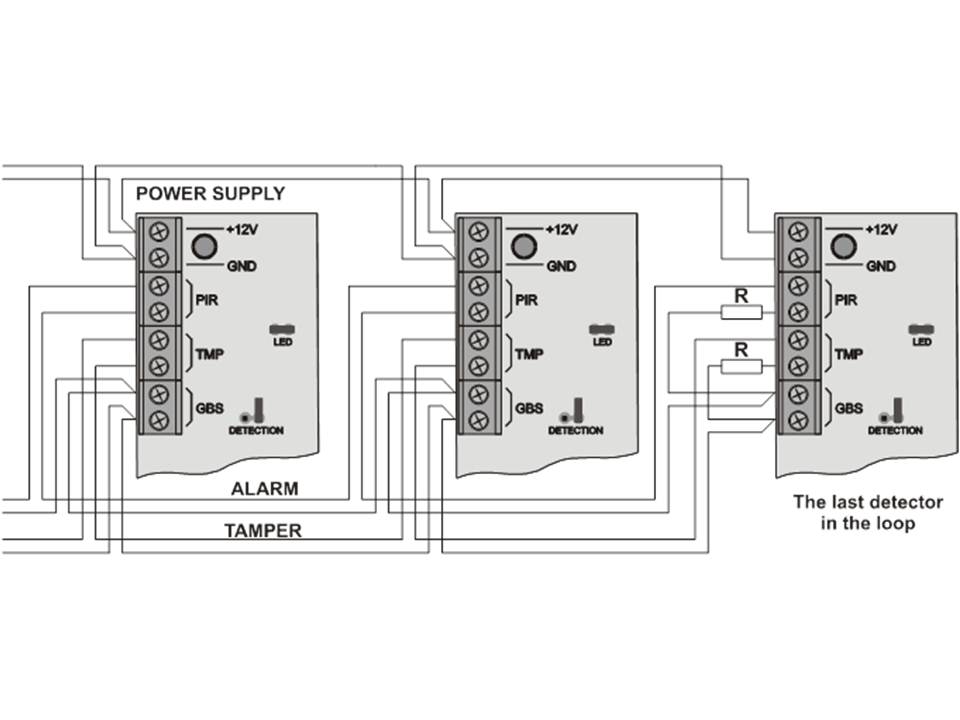
2 Terminals
+12V, GND power supply
PIR, PIR PIR alarm output (normally closed)
TMP, TMP TAMPER output (normally closed)
GBS, GBS auxiliary connections - useful with connecting the wires (see examples)
3 Jumpers
LED the LED indicator can be switched off by opening this jumper
DETECTION By opening this jumper you can set a higher analysis speed and improved immunity of the detector. This setting is suitable for problematic locations with unexpected temperature or magnetic field changes. The reactivity of the detector will be slightly slower with this setting.
4 Testing the detector
- After the detector is switched on, wait for 1 minute. During this period, the detector will try to initialise and stabilise its parameters (LED will light)
- Any detected movement will be indicated by the LED.
- Confirm that the detector covers the area to be protected with its detection range.
5 Lenses
Standard lens supplied with the JS-20 Largo detector covers an area of 120 degrees / 12 metres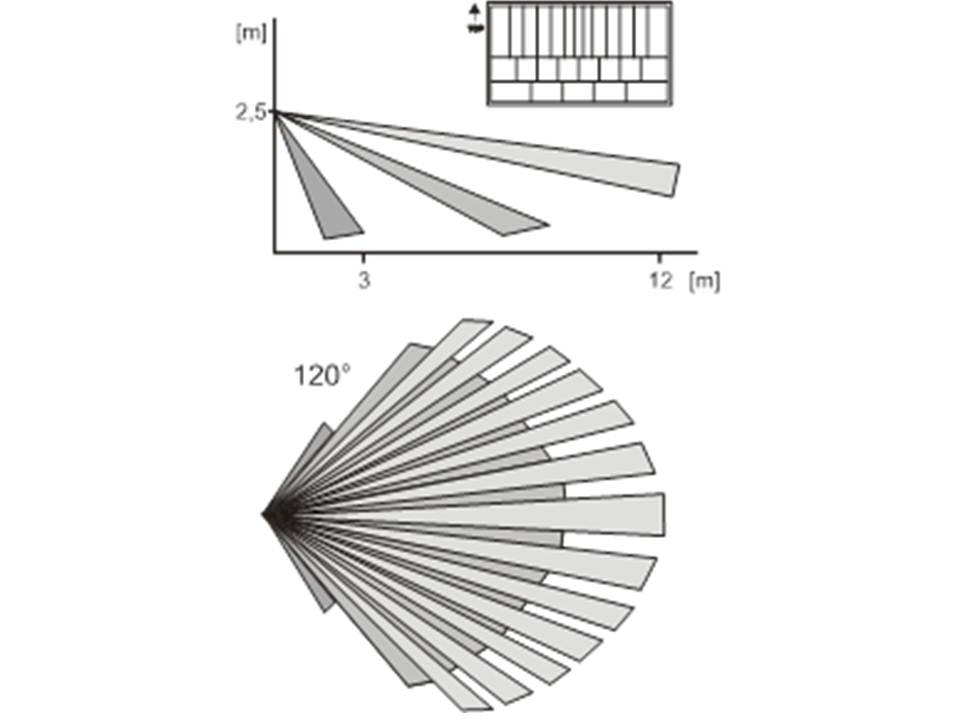
For other features of detection, other lenses can be used. Optional lenses for long corridors and for areas with small animals are sold separately.
Pet lens JS-7906. This lens prevents animals smaller than 40 cm from being detected by the detector. The range of the detector is reduced to 7 metres. It is recommended to test the lens with the animal during installlation to avoid a false alarm.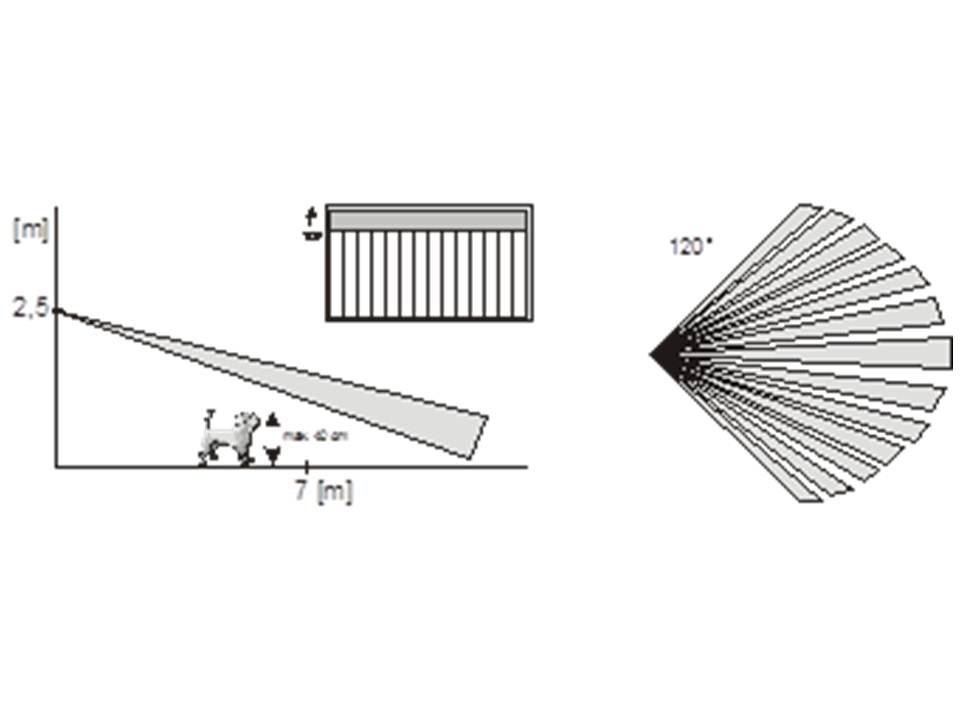
Corridor lens JS-7904. The range of this lens is 25 metres land and 3 metres wide. It is recommended to carefully test the sensitivity of the detector during installation.
6 Wiring