Tip for settings Hikvision IP camera
- , by Alarmsysteemexpert.nl
- 3 min read

These handy and simple tips will ensure that you get the best image from your Hikvision camera for any lighting situation.
From the manufacturer Hikvision, all cameras are supplied in standard settings that are sufficient for most situations. However, it may sometimes be desirable to change these settings in order to get the most optimal image from your Hikvision camera for that one tricky lighting situation. Since most have no experience with this, here are some tips on what to do and what not to do.
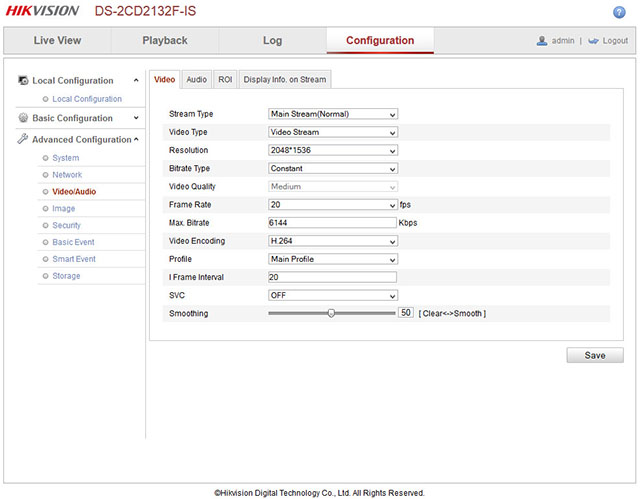
We start with the basic settings as they should be set in the camera and in the recorder for recording and live view. Below you can see a 3 megapixel camera Full HD. You can do the settings for the stream type main stream or sub stream. The main stream is important because that is the video image that will be used for the recordings, so it must be in the right position for sharp images.
The substream is used to stream the images to the APP and so this may be a lower quality, because not everywhere is a good network coverage but also because the screen of a smartphone is a lot smaller than that of your PC.
Below are the settings of the main stream as an example. Note the following settings. Set the resolution to 1080 or 1536, bitrate type to variable, Video Quality to highest. Framerate refers to the number of frames per second per camera which is recorded. so this one may go to at least 20 or higher. Television broadcasts take place at about 25Fps so live footage. Set the max. bit rate at max. 4000 kbps which is sufficient for a 3mp camera. This ensures that no more is streamed over the network for this camera than 4000kbps. Set the I frame interval to the same setting as the framerate. (fps).

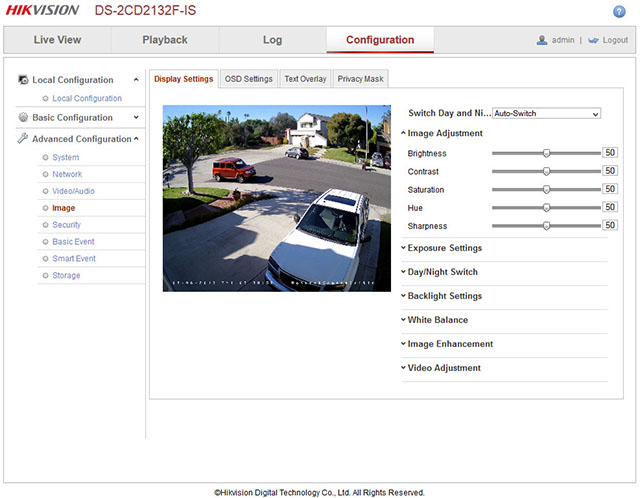
In the next screen you can adjust the picture settings. From the recorder, these settings can also be set per camera but are fairly basic such as brightness, contrast and color. Like your TV at home, this is often personal in terms of preference.
If you log in directly into the camera (sometimes PoE adapter required) you can adjust some important settings in image settings. Some tips, the exposure settings (exposure setting) defaults to 1/25 appropriate for walking people. If you set it to 1/50 (cyclists, or slow moving vehicles) or 1/100 (moving vehicles) the image when paused in the shot will be perfectly sharp, but the downside is that you will have a very dark image at night. So the best setting is 1/25 or 1/50. Do not necessarily set the gain high (this will make the image brighter and clearer) because otherwise it will result in more noise in the image.
The day night mode defaults to automatic with which the camera itself determines when it is too dark to change to black and white images and turns on the IR LEDs. When your camera location has enough lighting you could try switching it to daytime which sometimes gives you good color images instead of black and white images. This is best tested because every lighting situation is different.
Back light compensation refers to backlight compensation where you can use WDR to make objects, which are dark in the picture in bright backlight, light up more so that these dark areas become more visible.
White balance, leave in default and do not adjust.
Image Enchancement is image enhancement like Digital Noise reduction. You can turn this DNR on if you have a lot of noise at night. The disadvantage is the higher the DNR setting, the more spookeffect (lagging of images) you get with moving objects in the picture. So be sure not to set this setting too high. A brighter outdoor lamp works wonders!
Video Ajustment, (video adjustment) allows you to digitally mirror or rotate the image if necessary because you have installed the camera in a certain way, for example.


